Contents
- Step 1. CentOS 7 server preparation
- Step 2. Verify your DirectAdmin license information.
- Step 3. DirectAdmin Installation
- Step 4. Post-Install DirectAdmin Tasks
- Step 5. DirectAdmin HTTPS / SSL Configuration
- Step 6. Access DirectAdmin Control Panel
- Step 7. Switching DirectAdmin From Firewalld To CSF Firewall
- Step 8. DirectAdmin Skin Customisations
- Step 9. DirectAdmin Mail Handling
- Step 10. DirectAdmin Optimisations
- Step 11. Switching MySQL Server Versions – Oracle vs MariaDB MySQL
- Step 12. DirectAdmin Log Locations
- Step 13. Updating DirectAdmin
- Step 14. Speeding Up DirectAdmin Compile Times
- Summary
Step 5. DirectAdmin HTTPS / SSL Configuration
Next step is to setup HTTPS and SSL certificate to access DirectAdmin control panel over port 2222 and is from DirectAdmin documentation and requires that you have a working DNS A record for the hostname for your DirectAdmin server which you setup in in Step 1. This is because Letsencrypt SSL certificate domain validation needs for you to verify your intended domain name you want to issue a free Letsencrypt SSL certificate for.
By default looks like DirectAdmin’s Letsencrypt script defaults to generating RSA 4096bit SSL certificates. While more secure than RSA 2048bit SSL certificates, using RSA 4096bit SSL certs on Apache/Nginx site will severely tank web server performance under HTTPS compared to RSA 2048bit or better performing ECC 256bit (ECDSA) SSL certificates !
grep -in 4096 /usr/local/directadmin/scripts/letsencrypt.sh
29: DEFAULT_KEY_SIZE=4096
214:if [ ${KEY_SIZE} -ne 2048 ] && [ ${KEY_SIZE} -ne 4096 ]; then
215: echo "Wrong key size. It must be 2048 or 4096. Exiting..."
Letsencrypt steps:
Enabling Letsencrypt on DirectAdmin
- Verify if SNI and Letsencrypt are already enabled and set to 1, if not follow the addition steps to enable. The egrep command will report values 1 if enabled.
egrep 'enable_ssl_sni=|letsencrypt=' /usr/local/directadmin/conf/directadmin.conf
this BuyVM installation shows that Letsencrypt is already enabled and there’s no enable_ssl_sni option set
egrep 'enable_ssl_sni=|letsencrypt=' /usr/local/directadmin/conf/directadmin.conf
letsencrypt=1
- Enable and allow SNI.
sed -i 's|enable_ssl_sni=.*|enable_ssl_sni=1|' /usr/local/directadmin/conf/directadmin.conf
- Enable the letsencrypt=1 option in the /usr/local/directadmin/conf/directadmin.conf if not set. Can skip this for this BuyVM install:
sed -i 's|letsencrypt=.*|letsencrypt=1|' /usr/local/directadmin/conf/directadmin.conf
- Restart DirectAdmin:
echo "action=directadmin&value=restart" >> /usr/local/directadmin/data/task.queue; /usr/local/directadmin/dataskq d2000
- Add the /.well-known Alias if Letsencrypt wasn’t already enabled:
cd /usr/local/directadmin/custombuild
./build rewrite_confs
- Install the most recent version of the script if Letsencrypt wasn’t already enabled:
cd /usr/local/directadmin/custombuild
./build update
./build letsencrypt
Once enabled, users should then be able to see the LetsEncrypt option in their ‘Enhanced’ skin via User Level -> SSL Certificates or when you add a new domain setup and see Secure SSL check box.
Now that Letsencrypt support is enabled in DirectAdmin, you can setup a free Letsencrypt SSL certificate and HTTPS access point for your DirectAdmin control panel’s configured hostname (from Step 1 above) over port 2222 as outlined here. Replace your.hostname.com with your setup hostname from Step 1 above and should be same hostname used to answer the initial DirectAdmin setup.sh script’s hostname prompt which will also populate the servername option in /usr/local/directadmin/conf/directadmin.conf.
To verify servername value in /usr/local/directadmin/conf/directadmin.conf
grep -w 'servername' /usr/local/directadmin/conf/directadmin.conf
Then to run letsencrypt.sh script to obtain a free Letsencrypt SSL certificate. Replace hostname.yourdomain.com with your setup hostname from Step 1 above. Using RSA 4096bit SSL for DirectAdmin control panel should be fine, though you’d want RSA 2048bit for normal web site SSL certificates for better HTTPS performance.
cd /usr/local/directadmin/scripts
dahostname=hostname.yourdomain.com
./letsencrypt.sh request_single $dahostname 4096
The command will also install the new cert/key/ca files in all respective global places for Apache, Dovecot, Exim, ftp, and DirectAdmin.
dahostname=hostname.yourdomain.com
./letsencrypt.sh request_single $dahostname 4096
Setting up certificate for a hostname: hostname.yourdomain.com
Generating 4096 bit RSA key for let's encrypt account...
openssl genrsa 4096 > "/usr/local/directadmin/conf/letsencrypt.key"
Generating RSA private key, 4096 bit long modulus
.................................++
............................................................................................................................................................++
e is 65537 (0x10001)
Account has been registered.
Requesting new certificate order...
Processing authorization for hostname.yourdomain.com...
Waiting for domain verification...
Challenge is valid.
Challenge is valid.
Generating 4096 bit RSA key for hostname.yourdomain.com...
openssl genrsa 4096 > "/usr/local/directadmin/conf/cakey.pem.new"
Generating RSA private key, 4096 bit long modulus
..................................++
........................................++
e is 65537 (0x10001)
Checking Certificate Private key match... Match!
DirectAdmin certificate has been setup.
Setting up cert for Exim...
Setting up cert for WWW server...
Setting up cert for FTP server...
The services will be restarted in about 1 minute via the dataskq.
Certificate for hostname.yourdomain.com has been created successfully!
Next step is to then turn on SSL in DA and tell DA to use the carootcert, as well as force the hostname for SSL – again replace hostname.yourdomain.com with your setup hostname from Step 1 above. Note since DirectAdmin 1.58 RC releases, SSL=1 has been replaced with ssl=1.:
cd /usr/local/directadmin/conf
dahostname=hostname.yourdomain.com
# check directadmin.conf before changes
egrep '^SSL=|^carootcert=|^force_hostname=|^ssl_redirect_host=' directadmin.conf
perl -pi -e 's/SSL=0/ssl=1/' directadmin.conf
perl -pi -e 's/ssl=0/ssl=1/' directadmin.conf
echo "carootcert=/usr/local/directadmin/conf/carootcert.pem" >> directadmin.conf

# force hostname when using HTTPS
# https://www.directadmin.com/features.php?id=917
echo "force_hostname=$dahostname" >> directadmin.conf

# force hostname when using HTTPS # https://www.directadmin.com/features.php?id=917
echo "ssl_redirect_host=$dahostname" >> directadmin.conf
service directadmin restart
Checking directadmin.conf before changes
egrep -i '^SSL=|^carootcert=|^force_hostname=|^ssl_redirect_host=' /usr/local/directadmin/conf/directadmin.conf
ssl=0
Checking directadmin.conf after changes
egrep -i '^SSL=|^carootcert=|^force_hostname=|^ssl_redirect_host=' /usr/local/directadmin/conf/directadmin.conf
ssl=1
carootcert=/usr/local/directadmin/conf/carootcert.pem
force_hostname=hostname.yourdomain.com
ssl_redirect_host=hostname.yourdomain.com
You can also verify DirectAdmin’s Letsencrypt option settings via command
/usr/local/directadmin/directadmin c | grep letsencrypt
Output shows renewal for Letsencrypt SSL certificates happens at 60 day mark with renewal failure notifications after 5 attempts and the Letsencrypt SSL certificates covers the hostname as well as letsencrypt_list entries for www, mail, ftp, pop and smtp.
/usr/local/directadmin/directadmin c | grep letsencrypt
letsencrypt=1
letsencrypt_renewal_days=60
letsencrypt_renewal_failure_notice_after_attempt=5
letsencrypt_disable_renew_after_renew_failure=0
letsencrypt_max_requests_per_week=100
letsencrypt_multidomain_cert=2
letsencrypt_renewal_success_notice=0
letsencrypt_renewal_notice_to_admins=1
letsencrypt_renewal_error_to_users=1
renew_letsencrypt_on_suspended_domain=0
letsencrypt_account_email=0
letsencrypt_list=www:mail:ftp:pop:smtp
letsencrypt_list_selected=www
Step 6. Access DirectAdmin Control Panel
DirectAdmin can be accessed at either:
- http://server.ip.address:2222 — use the Admin username/password specified in the /usr/local/directadmin/scripts/setup.txt file in your scripts directory.
- or if using HTTPS/SSL at https://server.ip.address:2222 — use the Admin username/password specified in the /usr/local/directadmin/scripts/setup.txt file in your scripts directory.
Step 7. Switching DirectAdmin From Firewalld To CSF Firewall
CentOS 7 uses Firewalld wrapper to IPTables, however I prefer using CSF Firewall so the following steps are required to switch DirectAdmin over from Firewalld to using CSF Firewall. Also read further below for instructions on installing IPSET to allow handling large sets of blocked IP addresses if your server’s Linux Kernel supports IPSET.
There seems to be 2 ways of installing CSF Firewall
- Via http://files.directadmin.com/services/all/csf/csf_install.sh
- Via Poralix’s csf-bfm-install.sh installer
However, none of the scripts properly address CentOS 7’s default Firewalld usage which needs to be disable and for iptables-service YUM package to be installed via commands below. It is mentioned though in Poralix’s original article. It is how I have configured Centmin Mod’s CSF Firewall implementation ever since CentOS 7 was released. CSF Firewall is basically a wrapper to interface with IPTables.
systemctl disable firewalld
systemctl stop firewalld
yum -y install iptables-services
systemctl start iptables
systemctl start ip6tables
systemctl enable iptables
systemctl enable ip6tables
The CSF Firewall installation instructions which is also based off of Poralix’s csf-bfm-install.sh script as well:
wget -4 http://files.directadmin.com/services/all/csf/csf_install.sh
/bin/sh ./csf_install.sh
Alternatively, another method of installing CSF Firewall is via Poralix’s script in their Github repository to allow you to install CSF Firewall and also configure DirectAdmin Brute Force Monitor (BFM) to work with CSF Firewall. This script seems more extensive and thorough.
To install CSF Firewall with BFM support run the csf-bfm-install.sh script
mkdir -p /root/tools/poralix
cd /root/tools/poralix
wget -4 -O csf-bfm-install.sh https://raw.githubusercontent.com/poralix/directadmin-bfm-csf/master/install.sh
chmod 700 csf-bfm-install.sh
./csf-bfm-install.sh
To upgrade using Poralix’s script:
mkdir -p /root/tools/poralix
cd /root/tools/poralix
wget -4 -O csf-bfm-update.sh https://raw.githubusercontent.com/poralix/directadmin-bfm-csf/master/update.sh
chmod 700 csf-bfm-update.sh
./csf-bfm-update.sh
Example of csf-bfm-install.sh run output
./csf-bfm-install.sh
[NOTICE] CSF/LFD was not found on your server! Going to install it...
[OK] CSF/LFD check passed, going further with installation...

Selecting installer...

Running csf DirectAdmin installer

Installing csf and lfd

Check we're running as root

mkdir: created directory ‘/etc/csf’
‘install.txt’ -> ‘/etc/csf/install.txt’
Checking Perl modules...
Using configuration defaults
...Perl modules OK
And looks like testing mode is enabled in CSF so one extra manual step to do yourself.
‘/etc/csf/csf.conf’ -> ‘/var/lib/csf/backup/1563443139_pre_v13_03_upgrade’

*** USE_CONNTRACK Enabled

*** IPV6 Enabled

TCP ports currently listening for incoming connections:
21,22,25,53,110,111,143,465,587,993,995,3306

UDP ports currently listening for incoming connections:
53,68,111,679

Note: The port details above are for information only, csf hasn't been auto-configured.

Don't forget to:
1. Configure the following options in the csf configuration to suite your server: TCP_*, UDP_*
2. Restart csf and lfd
3. Set TESTING to 0 once you're happy with the firewall, lfd will not run until you do so

Adding current SSH session IP address to the csf whitelist in csf.allow:
Adding MYIP to csf.allow only while in TESTING mode (not iptables ACCEPT)
*WARNING* TESTING mode is enabled - do not forget to disable it in the configuration
Final output segment
Installation Completed

[OK] Updating a list of trusted binaries in /etc/csf/csf.pignore
cmd:spamd child
exe:/bin/dbus-daemon
exe:/lib/systemd/systemd-resolved
exe:/lib/systemd/systemd-timesyncd
exe:/sbin/ntpd
exe:/usr/bin/curl
exe:/usr/bin/dbus-daemon
exe:/usr/bin/dbus-daemon-1
exe:/usr/bin/fetchmail
exe:/usr/bin/freshclam
exe:/usr/bin/gzip
exe:/usr/bin/lsmd
exe:/usr/bin/ncftpput
exe:/usr/bin/python3.6
exe:/usr/bin/redis-server
exe:/usr/bin/tar
exe:/usr/bin/top
exe:/usr/bin/wget
exe:/usr/libexec/dovecot/anvil
exe:/usr/libexec/dovecot/imap
exe:/usr/libexec/dovecot/imap-login
exe:/usr/libexec/dovecot/lmtp
exe:/usr/libexec/dovecot/managesieve
exe:/usr/libexec/dovecot/managesieve-login
exe:/usr/libexec/dovecot/pop3
exe:/usr/libexec/dovecot/pop3-login
exe:/usr/libexec/dovecot/stats
exe:/usr/libexec/gam_server
exe:/usr/libexec/hald-addon-acpi
exe:/usr/libexec/hald-addon-keyboard
exe:/usr/libexec/openssh/sftp-server
exe:/usr/lib/polkit-1/polkitd
exe:/usr/local/bin/clamd
exe:/usr/local/bin/freshclam
exe:/usr/local/bin/pureftpd_uploadscan.sh
exe:/usr/local/directadmin/dataskq
exe:/usr/local/directadmin/directadmin
exe:/usr/local/libexec/dovecot/imap
exe:/usr/local/libexec/dovecot/imap-login
exe:/usr/local/libexec/dovecot/pop3
exe:/usr/local/libexec/dovecot/pop3-login
exe:/usr/local/libexec/dovecot/stats
exe:/usr/local/mysql-5.1.54-linux-x86_64/bin/mysqld
exe:/usr/local/sbin/nginx
exe:/usr/local/varnish/sbin/varnishd
exe:/usr/sbin/apache2
exe:/usr/sbin/chronyd
exe:/usr/sbin/exim
exe:/usr/sbin/hald
exe:/usr/sbin/httpd
exe:/usr/sbin/mysqld
exe:/usr/sbin/mysqld_safe
exe:/usr/sbin/named
exe:/usr/sbin/nginx
exe:/usr/sbin/nscd
exe:/usr/sbin/ntpd
exe:/usr/sbin/proftpd
exe:/usr/sbin/pure-ftpd
exe:/usr/sbin/rpcbind
exe:/usr/sbin/sshd
exe:/usr/sbin/varnishd
pcmd:/usr/bin/perl -T -w /usr/bin/sa-learn.*
pexe:/usr/local/mariadb-..-linux-x86_64/bin/mysqld
pexe:/usr/local/mysql-..-linux-x86_64/bin/mysqld
pexe:/usr/local/php../bin/php..
pexe:/usr/local/php../bin/php-cgi..
pexe:/usr/local/php../bin/php_uploadscan.sh
pexe:/usr/local/php../sbin/php-fpm..
user:munin
user:mysql
[NOTICE] CSF/LFD was installed! Configuration file can be found under /etc/csf/csf.conf

[OK] Installing block_ip.sh into /usr/local/directadmin/scripts/custom/
[OK] Installing unblock_ip.sh into /usr/local/directadmin/scripts/custom/
[OK] Installing show_blocked_ips.sh into /usr/local/directadmin/scripts/custom/
[OK] Installing brute_force_notice_ip.sh into /usr/local/directadmin/scripts/custom/
[OK] Disabling emails from CSF/LFD about temporary blocks of an IP brute-forcing server
[OK] Disabling emails from CSF/LFD about temporary blocks of an IP attacking Apache
[OK] Disabling email from CSF/LFD about permament blocks of an IP
[OK] Disabling CSF/LFD from scanning logs, Directadmin will do it instead
[OK] Opening passive ports for FTP incoming connections
[OK] Opening passive ports for outgoing connections
[OK] Enabling CSF/LFD

[IMPORTANT] Your SSH PORT is 22, it should be listed below as allowed

[OK] A list of opened ports in firewall
TCP_IN = "20,21,22,25,53,80,110,143,443,465,587,993,995,2222,35000:35999"
TCP_OUT = "20,21,22,25,53,80,110,113,443,587,993,995,2222,35000:65535"
UDP_IN = "20,21,53"
UDP_OUT = "20,21,53,113,123"
TCP6_IN = "20,21,22,25,53,80,110,143,443,465,587,993,995,2222,35000:35999"
TCP6_OUT = "20,21,22,25,53,80,110,113,443,587,993,995,2222,35000:65535"
UDP6_IN = "20,21,53"
UDP6_OUT = "20,21,53,113,123"

[OK] Setting bruteforce to 1 in /usr/local/directadmin/conf/directadmin.conf
bruteforce=1
[OK] Setting brute_force_log_scanner to 1 in /usr/local/directadmin/conf/directadmin.conf
[OK] Setting brute_force_scan_apache_logs to 2 in /usr/local/directadmin/conf/directadmin.conf
brute_force_scan_apache_logs=2
[OK] Setting brute_force_time_limit to 1200 in /usr/local/directadmin/conf/directadmin.conf
brute_force_time_limit=1200
[OK] Setting clear_brute_log_time to 48 in /usr/local/directadmin/conf/directadmin.conf
clear_brute_log_time=48
[OK] Setting hide_brute_force_notifications to 1 in /usr/local/directadmin/conf/directadmin.conf
hide_brute_force_notifications=1
[OK] Setting ip_brutecount to 30 in /usr/local/directadmin/conf/directadmin.conf
ip_brutecount=30
[OK] Setting unblock_brute_ip_time to 2880 in /usr/local/directadmin/conf/directadmin.conf
unblock_brute_ip_time=2880
[OK] Setting user_brutecount to 30 in /usr/local/directadmin/conf/directadmin.conf
user_brutecount=30
[OK] Scripts installed!

[INFO] Installed settings in Directadmin:
bruteforce=1
brute_force_log_scanner=1
brute_force_scan_apache_logs=2
brute_force_time_limit=1200
clear_brute_log_time=48
hide_brute_force_notifications=1
ip_brutecount=30
unblock_brute_ip_time=2880
user_brutecount=30

You can change them in Directadmin interface at admin level or in directadmin.conf

Installation complete!
CSF Firewall is installed and testing mode is disable at the end of the install process, so CSF Firewall is live and running.
grep '^TESTING =' /etc/csf/csf.conf
TESTING = "0"
Inspecting whitelisted CSF Firewall ports
egrep '^TCP_|^TCP6_|^UDP_|^UDP6_' /etc/csf/csf.conf
TCP_IN = "20,21,22,25,53,80,110,143,443,465,587,993,995,2222,35000:35999"
TCP_OUT = "20,21,22,25,53,80,110,113,443,587,993,995,2222,35000:65535"
UDP_IN = "20,21,53"
UDP_OUT = "20,21,53,113,123"
TCP6_IN = "20,21,22,25,53,80,110,143,443,465,587,993,995,2222,35000:35999"
TCP6_OUT = "20,21,22,25,53,80,110,113,443,587,993,995,2222,35000:65535"
UDP6_IN = "20,21,53"
UDP6_OUT = "20,21,53,113,123"
Make sure to backup the CSF Firewall current configuration profile so you can restore if needed
csf --profile backup after-csf-bfm-install
csf --profile backup after-csf-bfm-install
Creating backup...
‘/etc/csf/csf.conf’ -> ‘/var/lib/csf/backup/1563444098_after-csf-bfm-install’
Seems csf-bfm-install also made a CSF Firewall profile backup
csf --profile list

Configuration Profiles
======================
block_all_perm
block_all_temp
disable_alerts
protection_high
protection_low
protection_medium
reset_to_defaults

Configuration Backups
=====================
1563444098_after-csf-bfm-install (Thu Jul 18 03:01:38 2019)
1563443139_pre_v13_03_upgrade (Thu Jul 18 02:45:39 2019)
Finally ensure, CSF Firewall and LFD daemon starts up on server reboots
chkconfig lfd on
chkconfig csf on
chkconfig lfd on
Note: Forwarding request to 'systemctl enable lfd.service'.
chkconfig csf on
Note: Forwarding request to 'systemctl enable csf.service'.
Double check CSF Firewall works via csftest.pl
perl /etc/csf/csftest.pl
Testing ip_tables/iptable_filter...OK
Testing ipt_LOG...OK
Testing ipt_multiport/xt_multiport...OK
Testing ipt_REJECT...OK
Testing ipt_state/xt_state...OK
Testing ipt_limit/xt_limit...OK
Testing ipt_recent...OK
Testing xt_connlimit...OK
Testing ipt_owner/xt_owner...OK
Testing iptable_nat/ipt_REDIRECT...OK
Testing iptable_nat/ipt_DNAT...OK

RESULT: csf should function on this server
With csf-bfm-install.sh method, DirectAdmin will search for brute-force attacks in logs and tell CSF to block them. CSF Firewall will work as normally just it will ignore AUTH failed attempts and reply on DirectAdmin Brute Force Monitor to do that leg work. You can of course configure CSF Firewall do that job too as outlined here by editing CSF Firewall config file /etc/csf/csf.conf and ensure the following settings are enabled as:
LF_TRIGGER = "1"
LF_SSHD = "1"
LF_FTPD = "1"
LF_SMTPAUTH = "1"
LF_EXIMSYNTAX = "1"
LF_POP3D = "1"
LF_IMAPD = "1"
LF_HTACCESS = "1"
LF_MODSEC = "1"
LF_DIRECTADMIN = "1"
You can also change the script’s default settings by editing /root/directadmin-bfm-csf.conf. Add the lines which you want to change with your values.
Whenever you need to change the defaults in /root/directadmin-bfm-csf.conf:
USE_PORT_SELECTED_BLOCK="1";
CSF_GREP_API_CALL="0";
DEBUG="0";
FTP_PORTS="20 21";
SSH_PORTS="22";
WEB_PORTS="80 443";
EXIM_PORTS="25 465 587";
DOVECOT_PORTS="110 143 993 995";
DIRECTADMIN_PORTS="2222";
For example if you run DirectAdmin on a custom port, and you should add the line (change 1345 with your value) in /root/directadmin-bfm-csf.conf:
DIRECTADMIN_PORTS="1345";
If you want to block access for an offensive IP to all ports on your server, then add in /root/directadmin-bfm-csf.conf:
USE_PORT_SELECTED_BLOCK="0";
To further optimise CSF Firewall’s ability to handle larger sets of blocked IP addresses without slowing down your server, you should install IPSET (only if your Linux Kernel supports IPSET). I borrowed this partial snippet of code from my Centmin Mod LEMP installer which defaults to using an optimised CSF Firewall configuration for CentOS systems.
CSF Firewall defaults to IPSET support disabled
grep -w '^LF_IPSET' /etc/csf/csf.conf
LF_IPSET = "0"
The the below csf_ipset.sh script checks your Linux Kernel if it supports IPSET with exclusion check for Linode’s custom Kernels which bake IPSET support in natively and if system is non-OpenVZ6 (OpenVZ7/Virtuozzo use newer 3.10 Kernel which support IPSET too) and will install IPSET via YUM if the Linux Kernel supports it and will enable IPSET support in CSF Firewall.
Save the below code into script named csf_ipset.sh and give it executable permissions (chmod +x) and run it.
#!/bin/bash
#####################################################
# CSF Firewall IPSET configuration for DirectAdmin
# routine partially borrowed from centminmod.com
# CSF Firewall setup
######################################################
KERNEL_NUMERICVER=$(uname -r | awk -F. '{ printf("%d%03d%03d%03d\n", $1,$2,$3,$4); }')
ipset_setup() {
  if [[ ! -f /usr/sbin/ipset ]]; then
    # CSF now has ipset support to offload large IP address numbers
    # from iptables so uses less server resources to handle many IPs
    # does not work with OpenVZ VPS so only implement for non-OpenVZ
    yum -q -y install ipset ipset-devel
    sed -i 's/LF_IPSET = \"0\"/LF_IPSET = \"1\"/' /etc/csf/csf.conf
  elif [[ -f /usr/sbin/ipset ]]; then
    sed -i 's/LF_IPSET = \"0\"/LF_IPSET = \"1\"/' /etc/csf/csf.conf
  fi
}
if [[ ! -f /proc/user_beancounters ]] && [[ "$(uname -r | grep linode)" || "$(find /lib/modules/`uname -r` -name 'ipset')" ]]; then
  ipset_setup
elif [[ -f /proc/user_beancounters && "$KERNEL_NUMERICVER" -ge '3000000000' ]]; then
  # openvz7's 3.10 linux kernels support IPSET
  ipset_setup
fi
After running csf_ipset.sh, check LF_IPSET setting is enabled = 1
grep -w '^LF_IPSET' /etc/csf/csf.conf
LF_IPSET = "1"
Then once IPSET is installed and enabled in CSF Firewall, raise the CSF Firewall deny permanent and temporarily IP address limits from their defaults as CSF Firewall can now handle large IP data sets with IPSET.
sed -i 's/^DENY_IP_LIMIT = .*/DENY_IP_LIMIT = \"3000\"/' /etc/csf/csf.conf
sed -i 's/^DENY_TEMP_IP_LIMIT = .*/DENY_TEMP_IP_LIMIT = \"3000\"/' /etc/csf/csf.conf
Then restart CSF Firewall
csf -ra
DirectAdmin & Cloudflare Configuration via csfcf.sh
If you plan to use Cloudflare in front of DirectAdmin added domain site accounts, you’d need to whitelist Cloudflare’s IP addresses. As CSF Firewall is now in place, I can borrow my csfcf.sh script from Centmin Mod LEMP stack which can be setup as a cronjob to auto add Cloudflare’s IP addresses into the whitelisted allowed set. Update: instead of using csf option, use auto-apache option.
mkdir -p /root/tools
cd /root/tools
wget -4 -O /root/tools/csfcf.sh https://github.com/centminmod/centminmod/raw/123.09beta01/tools/csfcf.sh
chmod 700 /root/tools/csfcf.sh
# run once to whitelist CF IPs
/root/tools/csfcf.sh csf
Output
/root/tools/csfcf.sh csf
--------------------------------------------
Add Cloudflare IP list to CSF
from: https://www.cloudflare.com/ips-v4/
from: https://www.cloudflare.com/ips-v6/
--------------------------------------------

--------------------------------------------
Add to /etc/csf/csf.allow
--------------------------------------------
Adding 173.245.48.0/20 to csf.allow and iptables ACCEPT...
csf: IPSET adding [173.245.48.0/20] to set [chain_ALLOW]
Adding 103.21.244.0/22 to csf.allow and iptables ACCEPT...
csf: IPSET adding [103.21.244.0/22] to set [chain_ALLOW]
Adding 103.22.200.0/22 to csf.allow and iptables ACCEPT...
csf: IPSET adding [103.22.200.0/22] to set [chain_ALLOW]
Adding 103.31.4.0/22 to csf.allow and iptables ACCEPT...
csf: IPSET adding [103.31.4.0/22] to set [chain_ALLOW]
Adding 141.101.64.0/18 to csf.allow and iptables ACCEPT...
csf: IPSET adding [141.101.64.0/18] to set [chain_ALLOW]
Adding 108.162.192.0/18 to csf.allow and iptables ACCEPT...
csf: IPSET adding [108.162.192.0/18] to set [chain_ALLOW]
Adding 190.93.240.0/20 to csf.allow and iptables ACCEPT...
csf: IPSET adding [190.93.240.0/20] to set [chain_ALLOW]
Adding 188.114.96.0/20 to csf.allow and iptables ACCEPT...
csf: IPSET adding [188.114.96.0/20] to set [chain_ALLOW]
Adding 197.234.240.0/22 to csf.allow and iptables ACCEPT...
csf: IPSET adding [197.234.240.0/22] to set [chain_ALLOW]
Adding 198.41.128.0/17 to csf.allow and iptables ACCEPT...
csf: IPSET adding [198.41.128.0/17] to set [chain_ALLOW]
Adding 162.158.0.0/15 to csf.allow and iptables ACCEPT...
csf: IPSET adding [162.158.0.0/15] to set [chain_ALLOW]
Adding 104.16.0.0/12 to csf.allow and iptables ACCEPT...
csf: IPSET adding [104.16.0.0/12] to set [chain_ALLOW]
Adding 172.64.0.0/13 to csf.allow and iptables ACCEPT...
csf: IPSET adding [172.64.0.0/13] to set [chain_ALLOW]
Adding 131.0.72.0/22 to csf.allow and iptables ACCEPT...
csf: IPSET adding [131.0.72.0/22] to set [chain_ALLOW]
Adding 2400:cb00::/32 to csf.allow and iptables ACCEPT...
csf: IPSET adding [2400:cb00::/32] to set [chain_6_ALLOW]
Adding 2606:4700::/32 to csf.allow and iptables ACCEPT...
csf: IPSET adding [2606:4700::/32] to set [chain_6_ALLOW]
Adding 2803:f800::/32 to csf.allow and iptables ACCEPT...
csf: IPSET adding [2803:f800::/32] to set [chain_6_ALLOW]
Adding 2405:b500::/32 to csf.allow and iptables ACCEPT...
csf: IPSET adding [2405:b500::/32] to set [chain_6_ALLOW]
Adding 2405:8100::/32 to csf.allow and iptables ACCEPT...
csf: IPSET adding [2405:8100::/32] to set [chain_6_ALLOW]
Adding 2a06:98c0::/29 to csf.allow and iptables ACCEPT...
csf: IPSET adding [2a06:98c0::/29] to set [chain_6_ALLOW]
Adding 2c0f:f248::/32 to csf.allow and iptables ACCEPT...
csf: IPSET adding [2c0f:f248::/32] to set [chain_6_ALLOW]
Setup a cronjob to run every 12 hrs
23 */12 * * * /root/tools/csfcf.sh csf >/dev/null 2>&1
csfcf.sh auto-apache option
I have since updated csfcf.sh to support DirectAdmin’s Apache’s mod_remoteip module setup as well with 2 additional options
/root/tools/csfcf.sh apache
/root/tools/csfcf.sh auto-apache
apache option creates 2 Apache files
- /etc/httpd/conf/extra/httpd-includes-remoteip.conf which is automatically populated with relevant Apache mod_remoteip directives for RemoteIPHeader and automatic insertion of the latest obtained list of Cloudflare known IP addresses for setting RemoteIPTrustedProxy directives.
- /etc/httpd/conf/extra/cloudflare_customips.conf is an Apache Include file inserted into the first created file at /etc/httpd/conf/extra/httpd-includes-remoteip.conf. It’s purpose is to allow you to manually add custom RemoteIPTrustedProxy specified IP addresses other than automatically inserted Cloudflare IPs which persist and do not get overriden by csfcf.sh apache or auto-apache automated Cloudflare IP insertion/configuration.
auto-apache option
- does what apache option does just also gets the latest known Cloudflare IP list both IPv4 and IPv6 and adds them to CSF Firewall whitelisting and does conditional inspection of whether the server supports IPv6 networking. If server doesn’t support IPv6, then Cloudflare’s IPv6 IP addresses are commented out/disabled. If server does support IPv6, then Cloudflare’s IPv6 IPs are enabled/uncommented.
You’ll then manually insert as an Include file in /etc/httpd/conf/extra/httpd-includes.conf
Include /etc/httpd/conf/extra/httpd-includes-remoteip.conf
Verify if config is ok
httpd -t
Syntax OK
Then restart Apache
service httpd restart
If you had followed above instructions to configure DirectAdmin’s Apache /server-status and /server-info access, you can also then inspect mod_remoteip configuration at https://hostname.yourdomain.com/server-info/#mod_remoteip.c which shows the following information.
Module Name: mod_remoteip.c
Content handlers: none
Configuration Phase Participation: Create Server Config, Merge Server Configs
Request Phase Participation: Pre-Connection, Post-Read Request
Module Directives:
RemoteIPHeader - Specifies a request header to trust as the client IP, e.g. X-Forwarded-For
RemoteIPProxiesHeader - Specifies a request header to record proxy IP's, e.g. X-Forwarded-By; if not given then do not record
RemoteIPTrustedProxy - Specifies one or more proxies which are trusted to present IP headers
RemoteIPInternalProxy - Specifies one or more internal (transparent) proxies which are trusted to present IP headers
RemoteIPTrustedProxyList - The filename to read the list of trusted proxies, see the RemoteIPTrustedProxy directive
RemoteIPInternalProxyList - The filename to read the list of internal proxies, see the RemoteIPInternalProxy directive
RemoteIPProxyProtocol - Enable PROXY protocol handling ('on', 'off')
RemoteIPProxyProtocolExceptions - Disable PROXY protocol handling for this list of networks in CIDR format
Current Configuration:
In file: /etc/httpd/conf/extra/cloudflare_customips.conf
   1: RemoteIPInternalProxy 127.0.0.1
In file: /etc/httpd/conf/extra/httpd-includes-remoteip.conf
   3: RemoteIPTrustedProxy 173.245.48.0/20
   4: RemoteIPTrustedProxy 103.21.244.0/22
   5: RemoteIPTrustedProxy 103.22.200.0/22
   6: RemoteIPTrustedProxy 103.31.4.0/22
   7: RemoteIPTrustedProxy 141.101.64.0/18
   8: RemoteIPTrustedProxy 108.162.192.0/18
   9: RemoteIPTrustedProxy 190.93.240.0/20
  10: RemoteIPTrustedProxy 188.114.96.0/20
  11: RemoteIPTrustedProxy 197.234.240.0/22
  12: RemoteIPTrustedProxy 198.41.128.0/17
  13: RemoteIPTrustedProxy 162.158.0.0/15
  14: RemoteIPTrustedProxy 104.16.0.0/12
  15: RemoteIPTrustedProxy 172.64.0.0/13
  16: RemoteIPTrustedProxy 131.0.72.0/22
  24: RemoteIPHeader CF-Connecting-IP
Example of auto-apache run where no new Cloudflare know IPs were detected, so not output for CSF Firewall whitelisting insertions into /etc/csf/csf.allow but the Apache Include file /etc/httpd/conf/extra/httpd-includes-remoteip.conf was created.
/root/tools/csfcf.sh auto-apache
--------------------------------------------
Add Cloudflare IP list to CSF
from: https://www.cloudflare.com/ips-v4/
from: https://www.cloudflare.com/ips-v6/
--------------------------------------------

--------------------------------------------
Add to /etc/csf/csf.allow
--------------------------------------------

created /etc/httpd/conf/extra/httpd-includes-remoteip.conf include file
Contents of /etc/httpd/conf/extra/httpd-includes-remoteip.conf on BuyVM VPS server with DirectAdmin Apache installed where VPS does not support IPv6.
Include /etc/httpd/conf/extra/cloudflare_customips.conf
RemoteIPTrustedProxy 173.245.48.0/20
RemoteIPTrustedProxy 103.21.244.0/22
RemoteIPTrustedProxy 103.22.200.0/22
RemoteIPTrustedProxy 103.31.4.0/22
RemoteIPTrustedProxy 141.101.64.0/18
RemoteIPTrustedProxy 108.162.192.0/18
RemoteIPTrustedProxy 190.93.240.0/20
RemoteIPTrustedProxy 188.114.96.0/20
RemoteIPTrustedProxy 197.234.240.0/22
RemoteIPTrustedProxy 198.41.128.0/17
RemoteIPTrustedProxy 162.158.0.0/15
RemoteIPTrustedProxy 104.16.0.0/12
RemoteIPTrustedProxy 172.64.0.0/13
RemoteIPTrustedProxy 131.0.72.0/22
#RemoteIPTrustedProxy 2400:cb00::/32
#RemoteIPTrustedProxy 2606:4700::/32
#RemoteIPTrustedProxy 2803:f800::/32
#RemoteIPTrustedProxy 2405:b500::/32
#RemoteIPTrustedProxy 2405:8100::/32
#RemoteIPTrustedProxy 2a06:98c0::/29
#RemoteIPTrustedProxy 2c0f:f248::/32
RemoteIPHeader CF-Connecting-IP
In which case you can change the csfcsf.sh cronjob to use auto-apache option now.
23 */12 * * * /root/tools/csfcf.sh auto-apache >/dev/null 2>&1
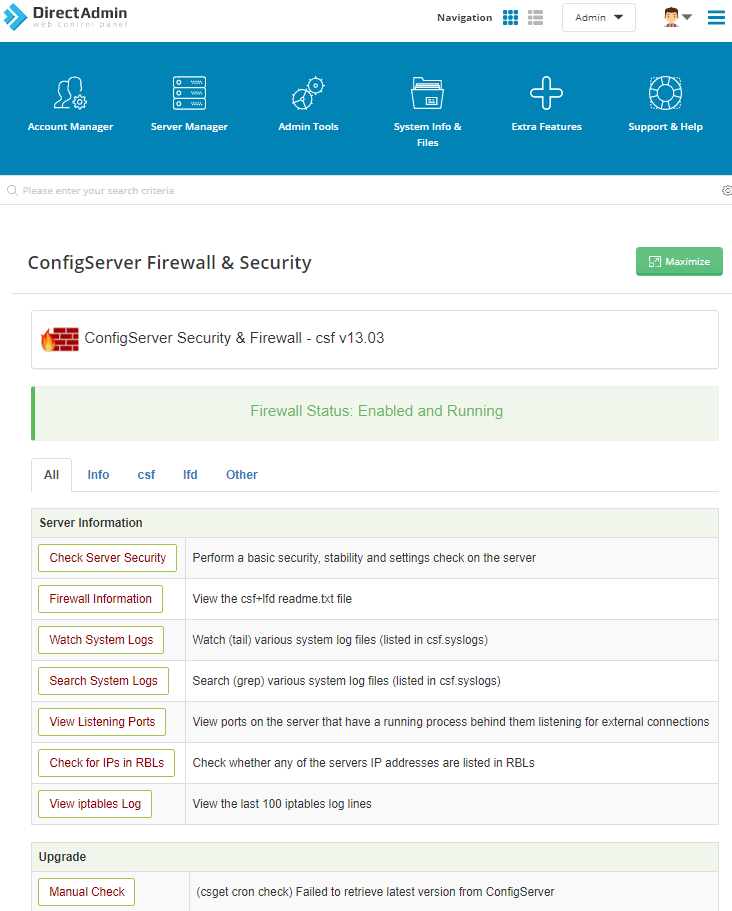
And DirectAdmin control panel CSF GUI interface – similar to cPanel/WHM CSF GUI.
Step 8. DirectAdmin Skin Customisations
DirectAdmin forums has a forum dedicated to DirectAdmin Skin releases.
If using DirectAdmin default Evolution skin, you can use Poralix directadmin-utils script under /core directory to update DirectAdmin Evolution skin as outlined here.
mkdir -p /root/tools/poralix
cd /root/tools/poralix
wget https://raw.githubusercontent.com/poralix/directadmin-utils/master/core/update_evolution.sh -O update_evolution.sh
chmod 755 update_evolution.sh
./update_evolution.sh
Step 9. DirectAdmin Mail Handling
Note, for new first time BuyVM VPS customers when you first provision a new VPS, mail ports are blocked by default until you contact their technical support to unblock the mail ports. This is a one time task you need to do.
By default DirectAdmin seems to prevent Exim from sending emails to the root user account i.e. root@hostname.yourdomain.com. I see in Exim /var/log/exim/mainlog log the following:
User 0 set for local_delivery transport is on the never_users list
So you need to decide which email address you want to use to receive root user destined system/server emails from. Then you can either setup a /root/.forward file and place that email address in the file. Or use /etc/aliases and setup root user to send emails to your desired email address.
Edit /etc/aliases
find
#root: marc
change to
root: your@email.com
If your desired email address for receiving root user destined emails supports alias usernames like Google GSuite/Gmail, then you can use a specific alias for your server so you can setup email filters to oragnise emails by labels or folders etc.
root: your+alias@email.com
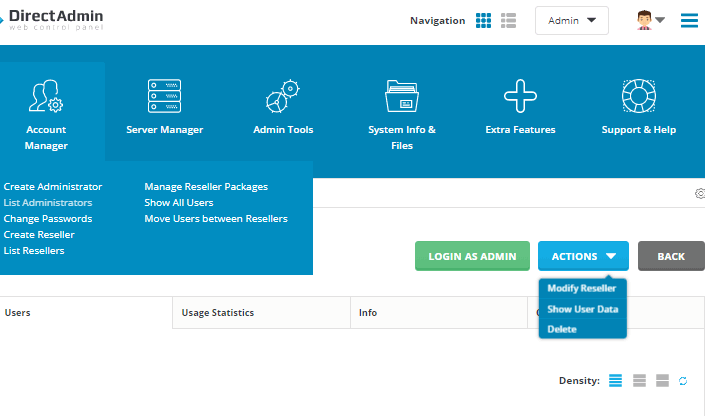
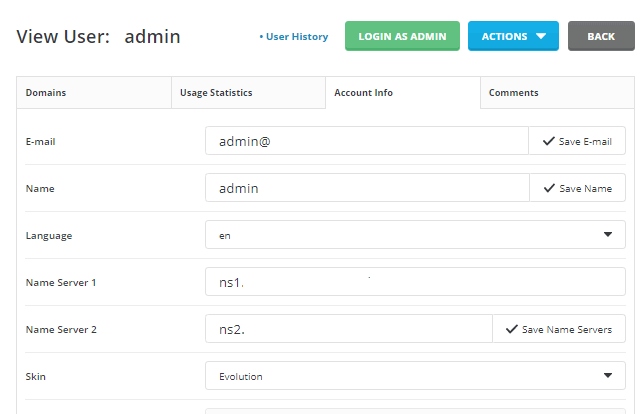
If you want to change DirectAdmin email sending domain from @hostname.yourdomain.com to @yourdomain.com, check out Poralix’s article. Where you login and go to Account Manager > List Administrators and click on admin username and under Actions drop down menu select, Show User Data and go to Info tab to change the sending email domain.
There are various additional steps to ensure that DirectAdmin sent emails do not end up in users spam/junk mail boxes. These include setting proper reverse PTR, SPF/TXT, DKIM and DMARC records for the sending domains. I wrote a guide for my Centmin Mod LEMP stack users regarding this where the steps in a general sense would apply to DirectAdmin as well. Both Centmin Mod LEMP stack and DirectAdmin have similar structure in that there’s a main hostname that is setup DNS wise to be the sending domain for emails originating from the server and are separate from individual site domains so that both main hostname and individual domain names require their own set of reverse PTR, SPF/TXT, DKIM and DMARC records. However, the manner in how you go about setting them all up may differ.
To ensure your site/server sent emails do not end up in users’ spam inboxes, you need proper SPF/TXT, DKIM, DMARC and reverse PTR DNS records setup for your domain and server’s main hostname (the one setup in Step 1 above).
There is a distinction between your site domain and server’s main hostname:
- server’s main hostname – If you use a web app like WordPress, Xenforo, IP.Board, Magento, etc to send emails. Then emails can either be sent as is via DirectAdmin’s Exim MTA server via @hostname.yourdomain.com where receiving email servers would evaluate the SPF, DKIM, DMARC and PTR DNS records for sending domain @hostname.yourdomain.com. If server’s main hostname i.e. hostname.yourdomain.com has valid SPF, DKIM, DMARC and PTR DNS records, then email will be less likely sent to spam box or being rejected by receiving email server.
- your domain – If your web app allows you to set a from email field and you sent emails from say user@domain.com, then receiving email servers would evaluate the SPF, DKIM, DMARC and PTR DNS records for sending domain @domain.com so your domain.com would need to have those SPF, DKIM, DMARC and PTR DNS records setup. If you use a 3rd party @domain.com provider like Google Gsuite, Outlook, Zoho etc, then those services will have instructions for setting up SPF, DKIM, DMARC and PTR DNS records.
DirectAdmin SPF TXT setup for outbound emails via Exim MTA
Simple as setting up a SPF TXT DNS record for your hostname i.e. hostname.yourdomain.com change SERVER_IP to your server’s public primary IP address
v=spf1 a mx ip4:SERVER_IP ~all
DirectAdmin DKIM setup for outbound emails via Exim MTA
DirectAdmin outlines DKIM setup instructions here.
First check if DKIM is configured and enabled in DirectAdmin
/usr/local/directadmin/directadmin c | grep dkim
dkim=0
dkim_selector=x
If dkim=0, then need to follow instructions by first downloading the exim.dkim.conf to /etc directory
wget -4 -O /etc/exim.dkim.conf http://files.directadmin.com/services/exim.dkim.conf
The /etc/exim.conf modification set to add reference to /etc/exim.dkim.conf isn’t required as it seems it’s already added on this DirectAdmin installation
grep -A7 'remote_smtp:' /etc/exim.conf
remote_smtp:
  driver = smtp
  headers_add = "${if def:authenticated_id{X-Authenticated-Id: ${authenticated_id}}}"
  interface = <; ${if exists{/etc/virtual/domainips}{${lookup{$sender_address_domain}lsearch*{/etc/virtual/domainips}}}}
  helo_data = ${if exists{/etc/virtual/helo_data}{${lookup{$sending_ip_address}iplsearch{/etc/virtual/helo_data}{$value}{$primary_hostname}}}{$primary_hostname}}
  hosts_try_chunking =
.include_if_exists /etc/exim.dkim.conf
Then restart Exim service
service exim restart
Then set dkim=1 in /usr/local/directadmin/conf/directadmin.conf and verify it is set
grep -i dkim /usr/local/directadmin/conf/directadmin.conf
echo 'dkim=1' >> /usr/local/directadmin/conf/directadmin.conf
grep -i dkim /usr/local/directadmin/conf/directadmin.conf
/usr/local/directadmin/directadmin c | grep dkim
Verify
/usr/local/directadmin/directadmin c | grep dkim
dkim=1
dkim_selector=x
From this point any new domains created/added via DirectAdmin will have DKIM keys generated and DNS zones updated.
For existing domains, you can either enable it individually for each domain, one-by-one – for DirectAdmin hostname created in Step 1, you’d replace domain.com with your hostname.yourdomain.com:
cd /usr/local/directadmin/scripts
./dkim_create.sh domain.com
or you can enable it for all of your domains like this:

echo "action=rewrite&value=dkim" >> /usr/local/directadmin/data/task.queue
You’ll find the created DKIM keys on the server at /etc/virtual/domain.com/ or hostname at /etc/virtual/hostname.yourdomain.com/
ls -lah /etc/virtual/hostname.yourdomain.com/
total 16K
drwxr-xr-x 2 mail mail 4.0K Jul 19 02:35 .
drwxr-xr-x 5 mail mail 4.0K Jul 19 02:38 ..
-rw------- 1 mail mail 1.7K Jul 19 02:35 dkim.private.key
-rw------- 1 mail mail  451 Jul 19 02:35 dkim.public.key
and the created DKIM TXT DNS record in your DirectAdmin control panel’s DNS management zone section for the domain or you can create it from your /etc/virtual/hostname.yourdomain.com/dkim.public.key replacing below hostname.yourdomain.com with your domain name and use selector = x._domainkey for domain.com or = x._domainkey.hostname for hostname.yourdomain.com.
dkim_domain=hostname.yourdomain.com
dkim_prefix="v=DKIM1; k=rsa; p=$(grep -v 'PUBLIC KEY' /etc/virtual/$dkim_domain/dkim.public.key | tr -d \\n)"
echo $dkim_prefix
Important: If any of your domains are hosted using an external DNS server i.e. Cloudflare DNS, Amazon AWS Route53 or domain registrar provider’s DNS management that DirectAdmin does not control, you MUST manually add the TXT records to the remote domain DNS zones. You can copy them over as needed. If the DNS does not have the records, but your emails are signed, this may increase the spam score of those emails, which is the opposite of what you want.
DirectAdmin DMARC Record setup for outbound Exim MTA
Once DKIM and SPF TXT records are properly setup, you can optionally add DMARC DNS records via various DMARC generators or services:
Then use a service like mail-tester.com to test your SPF/DKIM/DMARC configuration for your server hostname and domain names.
Using Amazon SES SMTP For Outbound Exim MTA
DirectAdmin’s Exim mail server can also be configured to use a remote SMTP server for sending outbound emails. I usually use Amazon SES SMTP transactional email services for better email deliverability. DirectAdmin has instructions for configuring Exim for using a remote SMTP server outlined here.
You would of already configured and setup your Amazon SES SMTP username/password credentials and setup the domain’s SPF/DKIM records and verified your domain and email addresses and requested via Amazon SES support to get out of SES sandbox mode.
Then in SSH session type these commands and replace with your appropriate Amazon SES SMTP username/password and AWS SES region’s SMTP server and then download as per DirectAdmin guide, the three Exim config files. Then use sed replacements to modify the three downloaded Exim config files and finally restart Exim
ses_username='YOUR_SES_SMTP_Username'
ses_password='YOUR_SES_SMTP_Password'
ses_smtp='email-smtp.us-east-1.amazonaws.com'
wget -4 -O /etc/exim.routers.pre.conf http://files.directadmin.com/services/SpamBlocker/smart_route/exim.routers.pre.conf
wget -4 -O /etc/exim.transports.pre.conf http://files.directadmin.com/services/SpamBlocker/smart_route/exim.transports.pre.conf
wget -4 -O /etc/exim.authenticators.post.conf http://files.directadmin.com/services/SpamBlocker/smart_route/exim.authenticators.post.conf
sed -i "s|your@email.com|$ses_username|" /etc/exim.authenticators.post.conf
sed -i "s|: yourpass|: $ses_password|" /etc/exim.authenticators.post.conf
sed -i "s|smtp.yourisp.com|${ses_smtp}::587|" /etc/exim.routers.pre.conf
sed -i 's|port = 25|port = 587|' /etc/exim.transports.pre.conf
service exim restart
Then use mail-tester.com again to test outbound Exim email sending again.
The resulting contents for the three downloaded Exim files
/etc/exim.transports.pre.conf
auth_relay:
driver = smtp
port = 587
hosts_require_auth = $host_address
hosts_require_tls = $host_address
/etc/exim.authenticators.post.conf
auth_login:
driver = plaintext
public_name = LOGIN
#replace your@email and yourpass
hide client_send = : YOUR_SES_SMTP_Username : YOUR_SES_SMTP_Password
/etc/exim.routers.pre.conf
smart_route:
driver = manualroute
domains = ! +local_domains
ignore_target_hosts = 127.0.0.0/8
condition = "${perl{check_limits}}"

#use remote_smtp only if you do not need smtp-auth.
#transport = remote_smtp

#use auth_relay if you do need to set the remote smtpauth
transport = auth_relay

route_list = * email-smtp.us-east-1.amazonaws.com::587
no_more
Step 10. DirectAdmin Optimisations
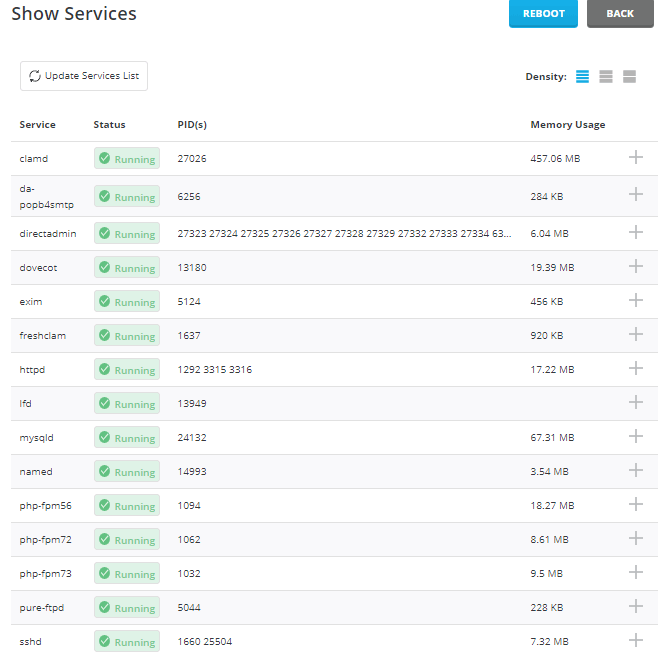
Adding your own system service status display to DirectAdmin service status page GUI as per instructions here, you can edit /usr/local/directadmin/data/admin/services.status. On current DirectAdmin installation made in this guide, the /usr/local/directadmin/data/admin/services.status file contains the following:
da-popb4smtp=ON
directadmin=ON
dovecot=ON
exim=ON
httpd=ON
mysqld=ON
named=ON
php-fpm72=ON
php-fpm73=ON
pure-ftpd=ON
sshd=ON
clamd=ON
freshclam=ON
lfd=ON
php-fpm56=ON
- ON means the dataskq will monitor it
- OFF means it won’t.
- If you click “Stop” from within DirectAdmin, it set to OFF so that the dataskq doesn’t try to start it.
- If you click “Start”, DirectAdmin will set it to ON in the service.status file and will start to monitor it.
Some SSHD tweaks
cp -a /etc/ssh/sshd_config /etc/ssh/sshd_config.backup
echo -e "\n" >> /etc/ssh/sshd_config
echo "ClientAliveInterval 3600" >> /etc/ssh/sshd_config
echo "ClientAliveCountMax 120" >> /etc/ssh/sshd_config
echo "UseDNS no" >> /etc/ssh/sshd_config
echo 'KexAlgorithms curve25519-sha256@libssh.org,ecdh-sha2-nistp521,ecdh-sha2-nistp384,ecdh-sha2-nistp256,diffie-hellman-group-exchange-sha256' >> /etc/ssh/sshd_config
echo 'Ciphers chacha20-poly1305@openssh.com,aes256-gcm@openssh.com,aes128-gcm@openssh.com,aes256-ctr,aes192-ctr,aes128-ctr' >> /etc/ssh/sshd_config
echo 'MACs hmac-sha2-512-etm@openssh.com,hmac-sha2-256-etm@openssh.com,umac-128-etm@openssh.com,hmac-sha2-512,hmac-sha2-256,umac-128@openssh.com' >> /etc/ssh/sshd_config
sed -i 's/#TCPKeepAlive yes/TCPKeepAlive yes/g' /etc/ssh/sshd_config
awk '$5 >= 3071' /etc/ssh/moduli > /etc/ssh/moduli.tmp && mv -f /etc/ssh/moduli.tmp /etc/ssh/moduli
/usr/sbin/sshd -t
service sshd restart
Modifying and updating DirectAdmin SSL ciphers as outlined here. Lets check existing defaults first
Apache default SSL ciphers which you can modify using instructions here.
grep '^SSL' /etc/httpd/conf/extra/httpd-ssl.conf | sort -u
SSLCACertificateFile /etc/httpd/conf/ssl.crt/server.ca
SSLCertificateFile /etc/httpd/conf/ssl.crt/server.crt
SSLCertificateKeyFile /etc/httpd/conf/ssl.key/server.key
SSLCipherSuite ECDHE-RSA-AES128-GCM-SHA256:ECDHE-ECDSA-AES128-GCM-SHA256:ECDHE-RSA-AES256-GCM-SHA384:ECDHE-ECDSA-AES256-GCM-SHA384:DHE-RSA-AES128-GCM-SHA256:DHE-DSS-AES128-GCM-SHA256:kEDH+AESGCM:ECDHE-RSA-AES128-SHA256:ECDHE-ECDSA-AES128-SHA256:ECDHE-RSA-AES128-SHA:ECDHE-ECDSA-AES128-SHA:ECDHE-RSA-AES256-SHA384:ECDHE-ECDSA-AES256-SHA384:ECDHE-RSA-AES256-SHA:ECDHE-ECDSA-AES256-SHA:DHE-RSA-AES128-SHA256:DHE-RSA-AES128-SHA:DHE-DSS-AES128-SHA256:DHE-RSA-AES256-SHA256:DHE-DSS-AES256-SHA:DHE-RSA-AES256-SHA:ECDHE-RSA-DES-CBC3-SHA:ECDHE-ECDSA-DES-CBC3-SHA:AES128-GCM-SHA256:AES256-GCM-SHA384:AES128-SHA256:AES256-SHA256:AES128-SHA:AES256-SHA:AES:CAMELLIA:DES-CBC3-SHA:!aNULL:!eNULL:!EXPORT:!DES:!RC4:!MD5:!PSK:!aECDH:!EDH-DSS-DES-CBC3-SHA:!EDH-RSA-DES-CBC3-SHA:!KRB5-DES-CBC3-SHA
SSLEngine on
SSLHonorCipherOrder On
SSLPassPhraseDialog builtin
SSLProtocol All -SSLv2 -SSLv3 -TLSv1
SSLSessionCache shmcb:/var/log/httpd/ssl_scache(512000)
SSLSessionCacheTimeout 300
Dovecot
cat /etc/dovecot/conf/ssl.conf
ssl_cert = </etc/exim.cert
ssl_key = </etc/exim.key
ssl_dh = </etc/dovecot/dh.pem

ssl_min_protocol = TLSv1
ssl_cipher_list = ALL:!ADH:RC4+RSA:+HIGH:+MEDIUM:-LOW:-SSLv2:-EXP
or
cat /usr/local/directadmin/custombuild/dovecot.conf | grep ssl
#ssl_cert_file = /etc/exim.cert
#ssl_key_file = /etc/exim.key
ssl_cert_file = /etc/httpd/conf/ssl.crt/server.crt
ssl_key_file = /etc/httpd/conf/ssl.key/server.key
ssl_cipher_list = ALL:!ADH:RC4+RSA:+HIGH:+MEDIUM:-LOW:-SSLv2:-SSLv3:-EXP
or
cat /usr/local/directadmin/custombuild/configure/dovecot/conf/ssl.conf
ssl_cert = </etc/exim.cert
ssl_key = </etc/exim.key
ssl_dh = </etc/dovecot/dh.pem

ssl_min_protocol = TLSv1
ssl_cipher_list = ALL:!ADH:RC4+RSA:+HIGH:+MEDIUM:-LOW:-SSLv2:-EXP
CSF Firewall’s GUI security check feature flags Dovecot’s default SSL ciphers with message but looks like CSF Firewall security check isn’t reading the right Dovecot files.
Mail Check
Check dovecot weak SSL/TLS Ciphers (ssl_cipher_list)
Cipher list []. Due to weaknesses in the SSLv2 cipher you should /etc/dovecot.conf and set ssl_cipher_list to explicitly exclude it. For example:
ssl_cipher_list = ALL:!ADH:RC4+RSA:+HIGH:+MEDIUM:-LOW:-SSLv2:-EXP
Setup /etc/dovecot/conf.d/10-ssl.conf with overriding ssl_cipher_list and ssl_min_protocol settings according to RedHat 7.
ssl_min_protocol = TLSv1.2
ssl_cipher_list = kEECDH:+kEECDH+SHA:kEDH:+kEDH+SHA:+kEDH+CAMELLIA:kECDH:+kECDH+SHA:kRSA:+kRSA+SHA:+kRSA+CAMELLIA:!aNULL:!eNULL:!SSLv2:!RC4:!MD5:!DES:!EXP:!SEED:!IDEA:!3DES
ssl_prefer_server_ciphers = yes
Or use CustomBuild custom Dovecot config – modifying custom/dovecot/conf/ssl.conf
cat custom/dovecot/conf/ssl.conf
ssl_cert = </etc/exim.cert
ssl_key = </etc/exim.key
ssl_dh = </etc/dovecot/dh.pem

ssl_min_protocol = TLSv1.2
ssl_cipher_list = kEECDH:+kEECDH+SHA:kEDH:+kEDH+SHA:+kEDH+CAMELLIA:kECDH:+kECDH+SHA:kRSA:+kRSA+SHA:+kRSA+CAMELLIA:!aNULL:!eNULL:!SSLv2:!RC4:!MD5:!DES:!EXP:!SEED:!IDEA:!3DES
ssl_prefer_server_ciphers = yes
cd /usr/local/directadmin/custombuild
mkdir -p custom/dovecot/conf
cp -a configure/dovecot/conf/ssl.conf custom/dovecot/conf/ssl.conf
./build dovecot_conf
./build dovecot_conf
Updating dovecot configuration files...
ensuring ssl_dh
Restarting dovecot.
Dovecot configuration files have been updated successfully.
Restart Dovecot service
service dovecot restart
OpenSSL test
echo -n | openssl s_client -crlf -connect 127.0.0.1:993 2>&1 | egrep -i 'cipher|protocol'
New, TLSv1/SSLv3, Cipher is ECDHE-RSA-AES256-GCM-SHA384
Protocol : TLSv1.2
Cipher : ECDHE-RSA-AES256-GCM-SHA384
Exim
egrep 'ssl_|cipher' /etc/exim.variables.conf
openssl_options=+no_sslv2 +no_sslv3
tls_require_ciphers=ECDHE-ECDSA-CHACHA20-POLY1305:ECDHE-RSA-CHACHA20-POLY1305:ECDHE-ECDSA-AES128-GCM-SHA256:ECDHE-RSA-AES128-GCM-SHA256:ECDHE-ECDSA-AES256-GCM-SHA384:ECDHE-RSA-AES256-GCM-SHA384:DHE-RSA-AES128-GCM-SHA256:DHE-RSA-AES256-SHA256:AES128-SHA:AES256-SHA:DES-CBC3-SHA:!DSS
Other mail SSL config checks
echo -n | openssl s_client -showcerts -connect localhost:993
echo -n | openssl s_client -showcerts -connect localhost:995
echo -n | openssl s_client -showcerts -connect localhost:465
echo -n | openssl s_client -starttls smtp -showcerts -connect localhost:25
echo -n | openssl s_client -starttls smtp -showcerts -connect localhost:587
Pure-ftpd
grep -i ssl /usr/local/directadmin/custombuild/configure/pureftpd/pure-ftpd.conf
# 0: disable SSL/TLS encryption layer (default).
TLSCipherSuite HIGH:MEDIUM:+TLSv1:!SSLv2:+SSLv3
Step 11. Switching MySQL Server Versions – Oracle vs MariaDB MySQL
To upgrade MySQL server versions use the outlined instructions here which also recommend recompiling PHP with each update.
I generally use MariaDB 10.3 MySQL server these days. I suggest folks not upgrade to MariaDB 10.4 unless you are fully aware of the breaking changes compared to previous MariaDB 10.3 and lower versions – these changes are drastic enough to deem MariaDB 10.4 as no longer being drop-in compatible with Oracle MySQL versions so essentially are a one way upgrade to MariaDB 10.4 with no way going back to lower versions without restoring from a MariaDB 10.3 or earlier full MySQL backup you would of made prior to upgrading.
Switch straight from MariaDB 5.5 to MariaDB 10.3 and automatically run MySQL backup in the process:
cd /usr/local/directadmin/custombuild
./build set mariadb 10.3
./build set mysql_inst mariadb
./build set mysql_backup yes
./build update
./build mariadb
or do my usual recommended incremental major version updates from MariaDB 5.5 to 10.0 to 10.1 to 10.2 to 10.3
cd /usr/local/directadmin/custombuild
./build update
./build set mysql_inst mariadb
./build set mysql_backup yes
./build set mariadb 10.0
./build mysql
./build set mariadb 10.1
./build mysql
./build set mariadb 10.2
./build mysql
./build set mariadb 10.3
./build mysql
Then recompile PHP
./build php n
Example output
./build set mariadb 10.3
Changed mariadb option from 10.0 to 10.3

./build set mysql_inst mariadb
Changed mysql_inst option from no to mariadb

./build set mysql_backup yes
Changed mysql_backup option from yes to yes
Building MariaDB 10.3 straight from MariaDB 5.5 – full log available via Gist and except below
./build mariadb
        Dumping database da_roundcube
        Dumping database mysql

Stopping mysqld ...
Upgrading MariaDB 5.5.63 to 10.3.16
Preparing packages...
MariaDB-client-5.5.63-1.el7.centos.x86_64
Preparing packages...
MariaDB-compat-5.5.63-1.el7.centos.x86_64
Preparing packages...
MariaDB-server-5.5.63-1.el7.centos.x86_64
warning: file /etc/init.d/mysql: remove failed: No such file or directory
Preparing packages...
MariaDB-devel-5.5.63-1.el7.centos.x86_64
Preparing packages...
MariaDB-common-5.5.63-1.el7.centos.x86_64
Preparing packages...
MariaDB-shared-5.5.63-1.el7.centos.x86_64
warning: MariaDB-client-10.3.16-1.el7.centos.x86_64.rpm: Header V4 DSA/SHA1 Signature, key ID 1bb943db: NOKEY
Preparing...                          ################################# [100%]
Updating / installing...
   1:MariaDB-compat-10.3.16-1.el7.cent################################# [ 14%]
   2:MariaDB-common-10.3.16-1.el7.cent################################# [ 29%]
   3:MariaDB-client-10.3.16-1.el7.cent################################# [ 43%]
   4:MariaDB-server-10.3.16-1.el7.cent################################# [ 57%]
   5:MariaDB-devel-10.3.16-1.el7.cento################################# [ 71%]
   6:MariaDB-shared-10.3.16-1.el7.cent################################# [ 86%]
   7:MariaDB-backup-10.3.16-1.el7.cent################################# [100%]
Failed to execute operation: File exists
Removed symlink /etc/systemd/system/multi-user.target.wants/mysqld.service.
Removed symlink /etc/systemd/system/mariadb.service.
Failed to execute operation: Too many levels of symbolic links
Ensuring local-infile is disabled for security reasons in MySQL configuration file...
Giving mysqld a few seconds to start up...
Phase 1/7: Checking and upgrading mysql database
Processing databases
mysql
mysql.columns_priv                                 OK
mysql.db                                           OK
mysql.event                                        OK
mysql.func                                         OK
mysql.help_category                                OK
mysql.help_keyword                                 OK
mysql.help_relation                                OK
mysql.help_topic                                   OK
mysql.host                                         OK
mysql.ndb_binlog_index                             OK
mysql.plugin                                       OK
mysql.proc                                         OK
mysql.procs_priv                                   OK
mysql.proxies_priv                                 OK
mysql.servers                                      OK
mysql.tables_priv                                  OK
mysql.time_zone                                    OK
mysql.time_zone_leap_second                        OK
mysql.time_zone_name                               OK
mysql.time_zone_transition                         OK
mysql.time_zone_transition_type                    OK
mysql.user                                         OK
Upgrading from a version before MariaDB-10.1
Phase 2/7: Installing used storage engines
Checking for tables with unknown storage engine
Phase 3/7: Fixing views
Phase 4/7: Running 'mysql_fix_privilege_tables'
Phase 5/7: Fixing table and database names
Phase 6/7: Checking and upgrading tables
Processing databases
da_roundcube
da_roundcube.cache                                 OK
da_roundcube.cache_index                           OK
da_roundcube.cache_messages                        OK
da_roundcube.cache_shared                          OK
da_roundcube.cache_thread                          OK
da_roundcube.contactgroupmembers                   OK
da_roundcube.contactgroups                         OK
da_roundcube.contacts                              OK
da_roundcube.dictionary                            OK
da_roundcube.identities                            OK
da_roundcube.searches                              OK
da_roundcube.session                               OK
da_roundcube.system                                OK
da_roundcube.users                                 OK
information_schema
performance_schema
Phase 7/7: Running 'FLUSH PRIVILEGES'
OK
cp: '/usr/lib/libmysqlclient.so' and '/usr/lib/mysql/libmysqlclient.so' are the same file
Restarting MySQL.
Installation completed.
Verify MariaDB 10.3 version upgrade
mysqladmin --defaults-extra-file=/usr/local/directadmin/conf/my.cnf ver
mysqladmin Ver 9.1 Distrib 10.3.16-MariaDB, for Linux on x86_64
Copyright (c) 2000, 2018, Oracle, MariaDB Corporation Ab and others.

Server version 10.3.16-MariaDB
Protocol version 10
Connection Localhost via UNIX socket
UNIX socket /var/lib/mysql/mysql.sock
Uptime: 4 min 35 sec

Threads: 7 Questions: 3 Slow queries: 0 Opens: 17 Flush tables: 1 Open tables: 11 Queries per second avg: 0.010
Inspecting default Character set and collation – seems latin1 is the default. I would switch to utf8 default as a bare minimum. For some utf8mb4 might be better if your web application needs the support i.e. Invision Board or Xenforo 2 with emoji support would require utf8mb4. But you’d have to be careful with running up against Innodb max key prefix length errors such as Index column size too large. The maximum column size is 767 bytes. Though MariaDB has settings to overcome this which I already deploy on my Centmin Mod LEMP stack’s MariaDB 10 installations – so will be looking at replicating this on DirectAdmin installations.
mysqladmin --defaults-extra-file=/usr/local/directadmin/conf/my.cnf var | tr -s ' ' | egrep 'char|collation'
| character_set_client | latin1 |
| character_set_connection | latin1 |
| character_set_database | latin1 |
| character_set_filesystem | binary |
| character_set_results | latin1 |
| character_set_server | latin1 |
| character_set_system | utf8 |
| character_sets_dir | /usr/share/mysql/charsets/ |
| collation_connection | latin1_swedish_ci |
| collation_database | latin1_swedish_ci |
| collation_server | latin1_swedish_ci |
| session_track_system_variables | autocommit,character_set_client,character_set_connection,character_set_results,time_zone |
Where does DirectAdmin save MariaDB MySQL settings ?
ls -lah /etc/my.cnf.d
total 32K
drwxr-xr-x 2 root root 4.0K Jul 18 07:09 .
drwxr-xr-x. 79 root root 12K Jul 18 07:09 ..
-rw-r--r-- 1 root root 295 Jun 14 15:25 client.cnf
-rw-r--r-- 1 root root 763 Jun 14 15:25 enable_encryption.preset
-rw-r--r-- 1 root root 232 Jun 14 15:25 mysql-clients.cnf
-rw-r--r-- 1 root root 1.1K Jul 18 07:09 server.cnf
The client.cnf defaults but I switch to utf8 character set via default-character-set=utf8
cat /etc/my.cnf.d/client.cnf
#
# These two groups are read by the client library
# Use it for options that affect all clients, but not the server
#
[client]
default-character-set=utf8

# This group is not read by mysql client library,
# If you use the same .cnf file for MySQL and MariaDB,
# use it for MariaDB-only client options
[client-mariadb]
The server.cnf defaults aren’t optimal at all – but under [mysqld] I switch from latin1 to utf8 default character set and collations via character-set-server=utf8 as well as a few extra settings under [mariadb-10.3] group.
#
# These groups are read by MariaDB server.
# Use it for options that only the server (but not clients) should see
#
# See the examples of server my.cnf files in /usr/share/mysql/
#

# this is read by the standalone daemon and embedded servers
[server]

# this is only for the mysqld standalone daemon
[mysqld]
character-set-server=utf8
local-infile = 0

#
# * Galera-related settings
#
[galera]
# Mandatory settings
#wsrep_on=ON
#wsrep_provider=
#wsrep_cluster_address=
#binlog_format=row
#default_storage_engine=InnoDB
#innodb_autoinc_lock_mode=2
#
# Allow server to accept connections on all interfaces.
#
#bind-address=0.0.0.0
#
# Optional setting
#wsrep_slave_threads=1
#innodb_flush_log_at_trx_commit=0

# this is only for embedded server
[embedded]

# This group is only read by MariaDB servers, not by MySQL.
# If you use the same .cnf file for MySQL and MariaDB,
# you can put MariaDB-only options here
[mariadb]

# This group is only read by MariaDB-10.3 servers.
# If you use the same .cnf file for MariaDB of different versions,
# use this group for options that older servers don't understand
[mariadb-10.3]
innodb_default_row_format = dynamic
innodb_file_per_table = 1
performance_schema=OFF
innodb_stats_on_metadata=OFF
innodb_sort_buffer_size=2M
Restart MariaDB MySQL 10.3 – there’s more optimal configuration defaults that can be applied but for now just testing to see if the config files edited are the ones reflected on MySQL restart settings wise.
service mysqld restart
Recheck character set and collation defaults and yup the client.cnf and server.cnf are correct in changing MariaDB 10.3 from latin1 to utf8 defaults.
mysqladmin --defaults-extra-file=/usr/local/directadmin/conf/my.cnf var | tr -s ' ' | egrep 'char|collation'
| character_set_client | utf8 |
| character_set_connection | utf8 |
| character_set_database | utf8 |
| character_set_filesystem | binary |
| character_set_results | utf8 |
| character_set_server | utf8 |
| character_set_system | utf8 |
| character_sets_dir | /usr/share/mysql/charsets/ |
| collation_connection | utf8_general_ci |
| collation_database | utf8_general_ci |
| collation_server | utf8_general_ci |
| session_track_system_variables | autocommit,character_set_client,character_set_connection,character_set_results,time_zone |
Step 12. DirectAdmin Log Locations
Installation isn’t complete without inspecting DirectAdmin logs to ensure that what has been installed is working correctly. For this you need to inspect DirectAdmin’s logs. Being new to DirectAdmin, you maybe a little lost as to knowing where the logs are located. Knownhost has a great wiki entry outlining all the DirectAdmin log locations.
DirectAdmin specific logs
- /var/log/directadmin/error.log – General errors for DirectAdmin’s service (directadmin.service)
- /var/log/directadmin/errortaskq.log – DirectAdmin’s internal task queue errors
- /var/log/directadmin/system.log – System-service reloads, quota tallies, Let’s Encrypt status, etc. are logged here
- /var/log/directadmin/login.log – Admin, Reseller, and User level successful and failed logins to the panel
- /var/log/directadmin/security.log – Execution of DirectAdmin’s plugins
- /var/log/directadmin/install.log – Seems to be a record of the ending initial DirectAdmin installation report log which also includes your DirectAdmin admin username, password and email
Apache Webserver logs
- /var/log/httpd/error_log – General Apache Error Logs
- /var/log/httpd/access_log – General Access Logs
- /var/log/httpd/suexec_log – SuEXEC Logs
- /var/log/httpd/fpexec_log – FpExec1) Logs
- /var/log/httpd/domains/yourdomain.com.log – Domain-Specific Access Logs
- /var/log/httpd/domains/yourdomain.com.error.log – Domain-Specific Error Logs
CustomBuild log
- /usr/local/directadmin/custombuild/custombuild.log
PHP-FPM logs
- /usr/local/phpXX/var/log/php-fpm.log – PHP-FPM logs: each version of PHP will have it’s own logs. Where XX is PHP version i.e. 56, 72, 73 etc
- /usr/local/php73/var/log/php-fpm.log – PHP-FPM logs for PHP 7.3
- /var/log/php-fpm73.log – This is a symbolic link to the above file – useful as a shortcut!
Nginx logs
- /var/log/nginx/access_log – General Nginx access logs
- /var/log/nginx/error_log – General Nginx error logs
- /var/log/nginx/modsec_audit.log – ModSecurity rule-processing2)
- /var/log/nginx/domains/yourdomain.com.log – Nginx logs for specific domains are logged on this path
- /var/log/nginx/domains/yourdomain.com.error.log – Nginx error logs for specific domains are logged on this path
FTP logs
- /var/log/messages – General FTPd errors are logged in the system’s main log
- /var/log/pureftpd.log – PureFTPd general logs
- /var/log/proftpd/access.log – If ProFTP is installed, this is where general access is logged
- /var/log/proftpd/auth.log – If ProFTP is installed, this is where login attempts are logged
Dovecot IMAP/POP3 logs
- /var/log/maillog – POP3/IMAP logins
- var/log/dovecot-lmtp.log – Delivery of emails to local accounts
- /var/log/dovecot-lmtp-errors.log – Errors with delivery of local email (i.e. mailbox is over quota)
Exim SMTP MTA logs
- /var/log/exim/mainlog – Main delivery and receipt log
- /var/log/exim/paniclog – Unexpected/Fatal error log
- /var/log/exim/processlog – Process logs
- /var/log/exim/rejectlog – Incoming-email Rejection logs
Named DNS logs
- /var/log/messages – BIND (named.service) logs to the main system log
Cron Job logs
- /var/log/cron – Cron daemon logs
MariaDB/MySQL logs
- /var/lib/mysql/hostname.yourdomain.com.err – MySQL startup and error log which is the same hostname you setup in above Step 1. Note for CentOS 7 and systemd systems, MySQL/MariaDB may also have logging accessible via journalctl.
journalctl -u mariadb --no-pager
CSF Firewall / LFD Daemon logs
- /var/log/lfd.log
Firewalld logs
- /var/log/firewalld
Step 13. Updating DirectAdmin
cd /usr/local/directadmin/custombuild
./build update
./build versions
./build update_versions
Step 14. Speeding Up DirectAdmin Compile Times
DirectAdmin’s installation and update routines and CustomBuild 2.0 rely heavily on source compilation and from my experience with cPanel/WHM and my own Centmin Mod LEMP development and optimizations, there is a huge room for improvement for DirectAdmin compilation speed. The main method is leveraging ccache for compiler caching on subsequent recompiles of same software versions etc (rebuilds). The performance improvement on recompiles can be as much as 30-80% faster in some cases for Nginx and PHP-FPM compilations !
To put this theory to the test, I whipped up a quick wrapper script, directadmin-compiler-bench.sh to time and benchmark DirectAdmin’s Apache, PHP-FPM and Apache + PHP-FPM software via Custombuild 2.0. The script can also dynamically enable compiler optimisations I usually do for Centmin Mod’s Nginx and PHP-FPM source compilation routines – these include using ccache compiler caching and also using newer GCC 8.3 compiler instead of CentOS 7’s native GCC 4.8.5. The ccache compiler cache speeds up source recompilations of the same versions while GCC 8.3 usage would potentially improve the software’s resulting Apache, PHP-FPM binary’s performance – especially for newer cpu models newer than Intel Xeon Broadwell like the newer Intel Xeon Skylake and AMD EPYC based processors.
directadmin-compiler-bench.sh wrapper script’s usage options
./directadmin-compiler-bench.sh

Usage:

./directadmin-compiler-bench.sh allon
./directadmin-compiler-bench.sh alloff
./directadmin-compiler-bench.sh gccon
./directadmin-compiler-bench.sh gccoff
./directadmin-compiler-bench.sh ccon
./directadmin-compiler-bench.sh ccoff
./directadmin-compiler-bench.sh install
./directadmin-compiler-bench.sh update
./directadmin-compiler-bench.sh bench apache
./directadmin-compiler-bench.sh bench php
./directadmin-compiler-bench.sh bench apache-php
./directadmin-compiler-bench.sh bench apache allon
./directadmin-compiler-bench.sh bench php allon
./directadmin-compiler-bench.sh bench apache-php allon
./directadmin-compiler-bench.sh bench apache gccon
./directadmin-compiler-bench.sh bench php gccon
./directadmin-compiler-bench.sh bench apache-php gccon
./directadmin-compiler-bench.sh bench apache ccon
./directadmin-compiler-bench.sh bench php ccon
./directadmin-compiler-bench.sh bench apache-php ccon
./directadmin-compiler-bench.sh bench apache alloff
./directadmin-compiler-bench.sh bench php alloff
./directadmin-compiler-bench.sh bench apache-php alloff
./directadmin-compiler-bench.sh bench apache gccoff
./directadmin-compiler-bench.sh bench php gccoff
./directadmin-compiler-bench.sh bench apache-php gccoff
./directadmin-compiler-bench.sh bench apache ccoff
./directadmin-compiler-bench.sh bench php ccoff
./directadmin-compiler-bench.sh bench apache-php ccoff
I ran directadmin-compiler-bench.sh just for CustomBuild 2.0 Apache build and recorded the compilation times for 3 configurations on the this BuyVM KVM VPS Slice 1 cpu, 1GB memory server which has fair share 1 cpu allocation:
- bench apache = without ccache compiler cache. Compile time = 200.293 seconds
- bench apache ccon run 1 = with ccache compiler cache 1st run which is uncached and populates the cache ready for 2nd run use. Compile time = 231.493 seconds which is 15.58% slower than without ccache for 1st uncached compile run.
- bench apache ccon run 2 = with ccache compiler cache 2nd run which can use ccache’s cache to speed up subsequent recompiles of same versions. Compile time = 159.888 seconds which is 20.17% faster than without ccache and 30.93% faster than with ccache’s uncached 1st run.
./directadmin-compiler-bench.sh bench apache
./directadmin-compiler-bench.sh bench apache ccon
./directadmin-compiler-bench.sh bench apache ccon
The first uncached compilation with ccache compiler caching will also be slower than without ccache due to the need to do the caching populating etc. Usually, you will do the first compiles with ccache disabled and enable ccache for subsequent recompilations.
I used ccache 3.7.2 latest release for the below tests and here’s the ccache cache statistics after the 2nd run with ccache enabled. There’s a 50.72% cache hit rate for 2nd ccache enabled recompilation of DirectAdmin’s Apache build using CustomBuild 2.0. You’ll see the cache hit rate rise as you do more recompiles over time.
ccache -s
cache directory /home/.ccache
primary config /home/.ccache/ccache.conf
secondary config (readonly) /usr/local/etc/ccache.conf
stats updated Mon Jul 22 07:10:07 2019
cache hit (direct) 628
cache hit (preprocessed) 5
cache miss 615
cache hit rate 50.72 %
called for link 44
called for preprocessing 280
compile failed 58
preprocessor error 78
bad compiler arguments 8
autoconf compile/link 414
no input file 24
cleanups performed 0
files in cache 1224
cache size 7.4 MB
max cache size 2.8 GB
Next I ran directadmin-compiler-bench.sh just for CustomBuild 2.0 PHP-FPM build which compiles 3x PHP versions, 7.3.7, 7.2.20 and 5.6.40 with ImagicK and Zend Opcache extensions and recorded the compilation times for 3 configurations on the this BuyVM KVM VPS Slice 1 cpu, 1GB memory server which has fair share 1 cpu allocation:
- bench php = without ccache compiler cache. Compile time = 4509.820 seconds
- bench php ccon run 1 = with ccache compiler cache 1st run which is uncached and populates the cache ready for 2nd run use. Compile time = 5141.003 seconds which is ~14% slower than without ccache for 1st uncached compile run.
- bench php ccon run 2 = with ccache compiler cache 2nd run which can use ccache’s cache to speed up subsequent recompiles of same versions. Compile time = 1439.342 seconds which is 68.1% faster than without ccache and ~72% faster than with ccache’s uncached 1st run.
./directadmin-compiler-bench.sh bench php
./directadmin-compiler-bench.sh bench php ccon
./directadmin-compiler-bench.sh bench php ccon
And ccache stats with 58.93% cache hit rate after PHP recompiles which reflects cummulative results of all source compilations which have had ccache cache compiler enabled for.
ccache -s
cache directory                     /home/.ccache
primary config                      /home/.ccache/ccache.conf
secondary config      (readonly)    /usr/local/etc/ccache.conf
stats updated                       Tue Jul 23 10:05:55 2019
cache hit (direct)                  8514
cache hit (preprocessed)              41
cache miss                          5961
cache hit rate                     58.93 %
called for link                      178
called for preprocessing            1206
compile failed                       342
preprocessor error                   338
bad compiler arguments                84
autoconf compile/link               3164
no input file                        176
cleanups performed                     0
files in cache                     11905
cache size                         219.3 MB
max cache size                       2.8 GB
Next I ran directadmin-compiler-bench.sh just for CustomBuild 2.0 Dovecot build as DirectAdmin update cron notified me there was a Dovecot version upgrade and recorded the compilation times for 3 configurations on the this BuyVM KVM VPS Slice 1 cpu, 1GB memory server which has fair share 1 cpu allocation:
- bench dovecot = without ccache compiler cache. Compile time = 879.963 seconds
- bench dovecot ccon run 1 = with ccache compiler cache 1st run which is uncached and populates the cache ready for 2nd run use. Compile time = 976.800 seconds which is ~11% slower than without ccache for 1st uncached compile run.
- bench dovecot ccon run 2 = with ccache compiler cache 2nd run which can use ccache’s cache to speed up subsequent recompiles of same versions. Compile time = 363.582 seconds which is ~58.7% faster than without ccache and ~62.8% faster than with ccache’s uncached 1st run.
./directadmin-compiler-bench.sh bench dovecot
./directadmin-compiler-bench.sh bench dovecot ccon
./directadmin-compiler-bench.sh bench dovecot ccon
So just for DirectAdmin Apache + PHP 7.3/7.2/5.6 + Dovecot recompile builds via CustomBuild 2.0 called from my directadmin-compiler-bench.sh wrapper script resulted in total compile times as follows:
- total without ccache compiler cache = Compile time = 200.293 + 4509.820 + 879.963 = 5590.076seconds
- total run 1 with ccache compiler cache 1st run which is uncached and populates the cache ready for 2nd run use = Compile time = 231.493 + 5141.003 + 976.800 = 6349.296 seconds which is ~13.6% slower than without ccache for 1st uncached compile run.
- total run 2 with ccache compiler cache 2nd run which can use ccache’s cache to speed up subsequent recompiles of same versions = Compile time = 159.888 + 1439.342 + 363.582 = 1962.812 seconds which is ~64.9% faster than without ccache and ~69.1% faster than with ccache’s uncached 1st run.
I will be doing more advanced DirectAdmin optimisation tuning (including newer GCC compiler tests) and benchmarks as I learn more about DirectAdmin’s internals and about CustomBuild routines.
Summary
The above guide illustrates how you can install DirectAdmin on CentOS 7 server. I will be writing more DirectAdmin related guides as my experience with DirectAdmin grows. This was literally my first ever DirectAdmin installation and first 14+ hrs experience with DirectAdmin and with DirectAdmin using source compilation for the majority of it’s software, I can see endless possibilities for me to put my own spin on the installation routines with optimisations I can bring over from my 16+ yrs in using cPanel/WHM and 8+ yrs in developing Centmin Mod LEMP stack (which has a mix of sourced compiled routines for Nginx and PHP-FPM with YUM repositories usage).
As DirectAdmin source compiles alot, there’s a definite benefit of using ccache for compiler caching on subsequent recompiles of same software versions etc (rebuilds). Centmin Mod LEMP has been using ccache for years and Nginx and PHP-FPM source recompilations are up to 80% faster than without ccache! It would be a huge speed up for DirectAdmin source compilation routines i.e. CustomBuild.
I’d like to thank smtalk and bdacus01 on DirectAdmin forums for their answers to my questions and wonderful and insightful replies and knowledge provided by zEitEr on the DirectAdmin forums and his Poralik site. You can find me on the DirectAdmin forums as eva2000.
If you like this guide and want to try DirectAdmin out, checkout BuyVM.net’s dedicated KVM Slice VPS servers which bundle in a free DirectAdmin license ! Using my BuyVM.net referral link would also be much appreciated.